Replacing a full HVAC system is one of the biggest investments most homeowners make in their home — somewhere between the cost of a used car and a kitchen remodel. And here’s the part most homeowners don’t realize until it’s too late: the brand on the box matters far less than how the system is installed.
A Trane 20 TruComfort installed poorly will fail before any basic 14 Seer2 installed correctly. We know because we repair other people’s bad installs every week in Austin, Cedar Park, Round Rock, and the rest of our service area. The compressor failures at year three, the ECM blower failures at year four, the coil leaks at year five — most of them are preventable, and most of them trace back to shortcuts taken on the day the system went in.
A quick word about who we are, because it shapes everything you’re about to read. Texas Bree is not a high-volume operation pushing as many installs through the schedule as possible. We intentionally work on fewer projects at a time so we can give each home, each duct system, and each customer the individual attention it actually needs.
This guide walks through what a proper HVAC installation should actually include, why each step matters, and how to tell the difference between a serious contractor and a quick-buck operator. At the end is a contractor interview checklist you can save on your phone and use for every estimate you get.
Why Installation Quality Matters More Than the Brand on the Box
Trane, Carrier, Lennox, and the other top-tier manufacturers all build genuinely excellent equipment. The failure modes we see in the field — compressors dying young, coils leaking, blowers burning out, humidity never getting controlled — are almost never the equipment’s fault. They’re the installation’s fault.
Skipped nitrogen purge produces scale inside the copper lines, which turns into acid, which destroys the compressor two to five years later. Inadequate vacuum leaves moisture in the system, which also turns into acid. Wrong airflow starves the coil and freezes it up every summer. Missing float switches cause drain overflows that destroy ceiling drywall. None of these problems show up the day the system is installed. They show up two, three, or five years later.
If you want the deeper technical background on compressor failure and contamination, start here: AC Compressor Replacement: When It Makes Sense and When It Doesn’t.
Before the Install: Proper Assessment, Not Always a Manual J
A lot of HVAC marketing content pushes Manual J load calculations as something that has to happen for every installation. That’s not quite accurate, and we’d rather be honest with you.
For most replacement jobs, a like-for-like installation is the right answer. If your previous system was the correct tonnage for your home, you were comfortable, and your energy bills and humidity were reasonable, we install a new system with the same tonnage and configuration in the same location.
When we do a full Manual J load calculation: if you’ve had comfort complaints with the previous system; if you’ve renovated; if you’re stepping up significantly in equipment tier and need to rethink airflow. In those cases, recalculation matters.
Preparing Your Home: Floor Protection and EPA 608 Recovery
The first thing that should happen when the crew arrives is your home getting protected. Drop cloths over floors in the work path, shoe covers on every technician, pathway cleared to the equipment.
Before the old equipment comes out, the existing refrigerant gets recovered. Under EPA Section 608, refrigerant recovery is required by federal law. Venting refrigerant to the atmosphere is illegal, and fines can run up to $37,500 per day per occurrence.
Equipment Placement, Electrical, and the Mandatory Float Switch
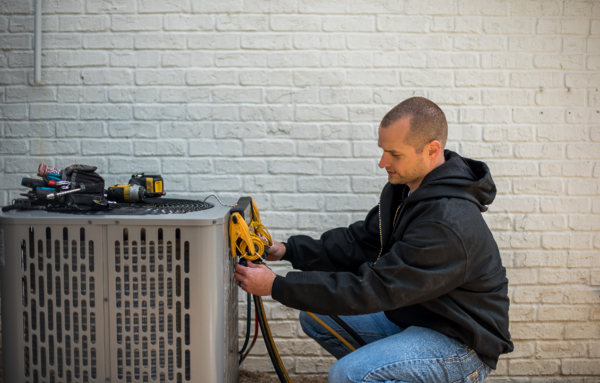
The outdoor unit goes on a level, corrosion-resistant pad with proper clearance for airflow and service access. A new electrical whip and service disconnect get installed, and grounding is verified.
Indoors, the air handler is set level, securely mounted, with proper clearance for filter changes and future service. Electrical disconnect and grounding are verified.
Every system we install has a properly sloped drain, a secondary drain path, and a float switch wired to shut the system down if water backs up. The float switch is not an upgrade in our installations. It’s mandatory.
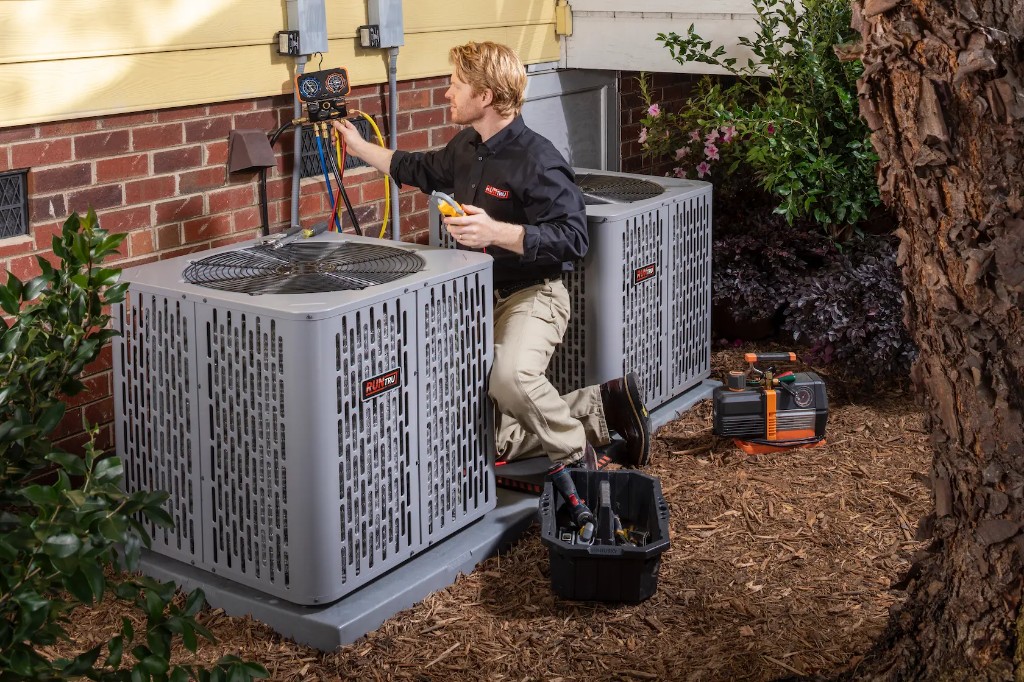
The Refrigerant Work Where Quality Is Won or Lost
Nitrogen purge during brazing. When copper refrigerant lines are brazed at high temperature, oxygen forms copper oxide scale inside the line. Dry nitrogen flowing through the line during brazing displaces oxygen and prevents scale.
Triple evacuation and deep vacuum. We pull to 500 microns or lower on a micron gauge and run a decay test to confirm the vacuum holds. Water + refrigerant + oil + heat = acid.
Filter drier. A new filter drier is installed to catch residual moisture or particles.
Charge verification. Charge gets verified via subcool/superheat (or SmartCharge™ with verification on applicable systems).
Airflow Commissioning: Static Pressure and CFM Aren’t Optional
Total External Static Pressure. We measure static pressure across the air handler with a manometer. If it’s high, your ducts are restricting airflow. We measure, we document, and we tell you before you pay for a system that can’t perform.
CFM airflow verification. Airflow target is typically around 400 CFM per ton for cooling, adjusted for your home. We configure and verify the ECM blower to hit spec.
Trane Link Commissioning and Long-Term Remote Monitoring
If your new system is a Trane Link communicating system, commissioning adds steps that only Trane-trained technicians know how to do properly: component enrollment, thermostat programming, fault log clearing, and Trane Home app enrollment.
Once your Trane Link system is running, we can keep remote visibility too — energy use, runtime hours, modulation patterns, fault codes, static pressure drift — so we can fine-tune how your system runs.
If you want the full breakdown of what makes a Trane Link system work, read our companion post: Trane Communicating Systems Explained.
Thinking about a replacement and want it done right the first time?
Get a Free Estimate at /proposal-builder/ or call (512) 638-4713. We’ll walk you through your options — no pressure, no upsell.
Austin, TX • Cedar Park • Round Rock • Pflugerville • Leander • Georgetown • Brushy Creek
Startup and Safety Testing Before We Leave the Driveway
Before we pack up, every safety circuit and every operating mode gets tested and documented: float switch, pressure switches, cooling, heating, auxiliary heat, and dehumidification logic where applicable.
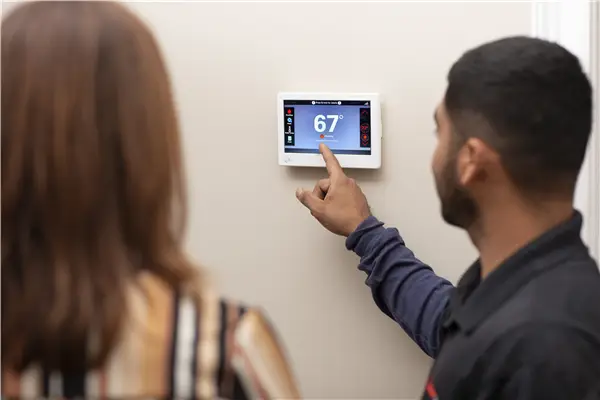
The Walk-Through: 15-20 Minutes That Matter

Before the van leaves your driveway, we spend 15–20 minutes walking you through the system: filter changes, thermostat/app basics, disconnects, float switch meaning, normal operation, warning signs, and when to call.
Documentation, Permits, and Warranty Registration
Permits get pulled under our Texas HVAC license. You receive a written commissioning report including model/serial numbers, micron level, charge verification readings, static pressure, CFM configuration, and safety test results. We register Trane warranty within 60 days and send confirmation.
Workmanship Warranty: What the Industry Standard Really Is
Equipment warranty covers hardware. Workmanship warranty covers labor to fix installation-related issues. Industry standard is 1–3 years of workmanship warranty. Bree HVAC provides 1–2 years through JB Warranty, depending on system tier.
Why a Proper Installation Takes Up to Two Days
A full HVAC system replacement, done properly, typically takes about two days. Compressing it into 6–8 hours is only possible by skipping steps like nitrogen purge, deep vacuum verification, static pressure measurement, safety testing, documentation, and a real walk-through.
We deliberately run a low-volume model so we have the time to do the measurements, documentation, and walk-through without watching the clock.
Red Flags When Talking to Any HVAC Contractor
- Won’t provide license/insurance
- Claims permits aren’t needed
- Doesn’t mention nitrogen purge, micron level, static pressure, or CFM
- Promises an 8-hour full system replacement
- Subcontracted installs with rotating crews
- No workmanship warranty (or under 1 year)
Contractor Interview Checklist — Save This

Save this checklist and use it on every estimate. Ask open-ended questions and compare their answers to what a proper installation requires.
-
Are you licensed and insured? Can I see the documentation?
Expected: Texas HVAC license number + proof of liability insurance, shown immediately.
-
Do you use your own crew or subcontract?
Expected: In-house employees. One company owns quality + warranty.
-
Will you pull a permit?
Expected: Yes, under their license. Inspection scheduled.
-
Do you flow nitrogen while brazing?
Expected: Yes — nitrogen purge prevents oxidation/scale.
-
What vacuum level do you pull, and how do you verify it?
Expected: 500 microns or lower on a micron gauge + decay test.
-
How will you verify refrigerant charge?
Expected: Subcool/superheat at operating conditions (or SmartCharge™ + verification).
-
Will you measure total external static pressure and verify CFM airflow?
Expected: Yes — measured and documented.
-
Do you include a float switch on every install?
Expected: Yes — primary/secondary protection.
-
How long will the installation take, and why?
Expected: One long day (14–16 hours) or two days (10–12 hours each), depending on complexity.
-
Which safety switches/modes/equipment will you test before leaving?
Expected: Float switch, pressure switches, cooling/heating/aux heat/dehumidification.
-
What documentation do I get?
Expected: Written commissioning report with microns, charge readings, static pressure, CFM, safety tests.
-
What workmanship warranty do you offer, and who backs it?
Expected: 1–3 years is typical; (Bree HVAC Contractor uses JB Warranty)
-
Will you register my Trane warranty within 60 days?
Expected: Yes — and provide confirmation.
-
Will you walk me through the system before you leave?
Expected: 15–20 minute walk-through, questions answered.
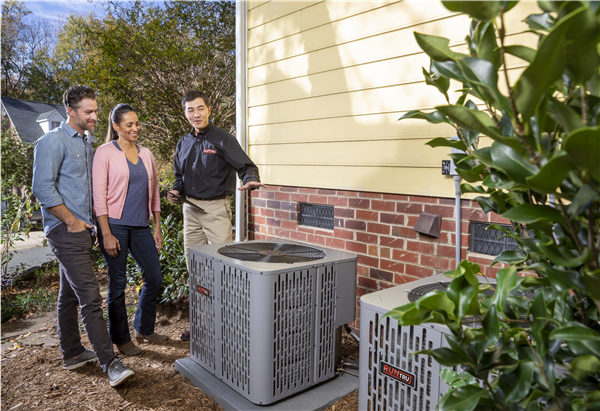
Why Austin Homeowners Choose Texas Bree

Texas Bree is deliberately not a high-volume, assembly-line operation. We take on fewer projects so every home gets the time it needs: measurements, documentation, and a real walk-through.
Licensed and insured. Our own technicians — no subcontractors. Written commissioning report on every install. Permits pulled. Floor protection and cleanup standard. 1–2 year workmanship warranty through JB Warranty. Trane Link remote monitoring for communicating systems. Serving Austin, Cedar Park, Round Rock, Pflugerville, Leander, Georgetown, and Brushy Creek.
Frequently Asked Questions
How long does a proper HVAC installation really take?
A full system replacement typically takes two days at roughly 10–12 hours per day, or about 14–16 hours in one long day when the job is simple. Anyone promising an 8-hour full system install is almost certainly skipping critical steps.
Do I need a Manual J load calculation every time?
Not usually. Like-for-like replacement is often correct when the old system was properly sized and you had no comfort issues. Manual J matters when there were comfort problems, major renovations, or significant configuration changes.
Why does nitrogen purge during brazing matter so much?
Without nitrogen, oxidation creates scale inside the line set. That contamination circulates, contributes to acid formation, and can destroy a compressor within a few years.
What’s the difference between equipment warranty and workmanship warranty?
Equipment warranty covers the hardware. Workmanship warranty covers labor for installation-related issues. Industry standard workmanship coverage is 1–3 years.
Can I reuse my existing refrigerant line set?
Sometimes. If the line set is correctly sized, intact, and compatible with the new refrigerant, it may be reusable with proper procedures. If it’s undersized, damaged, or incompatible, it should be replaced.
I think my last installation was done poorly. What can I do now?
Have an independent contractor measure static pressure, verify charge, inspect drains/float switches, and check for contamination indicators. Many issues can be corrected before they damage major components.
Ready for an HVAC installation done by the book?
Get a Free Estimate at /proposal-builder/ or call (512) 638-4713. We’ll walk you through your options — no pressure, no upsell.
Austin, TX • Cedar Park • Round Rock • Pflugerville • Leander • Georgetown • Brushy Creek
Bree HVAC Contractor serves Austin, Cedar Park, Round Rock, Pflugerville, Leander, Georgetown, and Brushy Creek — with our own crew, a written commissioning report, and a 1–2 year workmanship warranty through JB Warranty on every installation.
